A cleanly laid vinyl floor only truly looks finished when the wall trim is right. This is where the same question arises in many projects: How can baseboards be installed with vinyl without risking unsightly gaps, rattling strips, or problems with the expansion joint? The good news: With the right preparation, the trim is quickly installed and looks neat and tidy for a long time.
Why Baseboards with Vinyl are More Than Just Decoration
Baseboards don't just cover the cut edge at the perimeter. They protect the wall from vacuum cleaner bumps in everyday use, cover the necessary expansion joint, and ensure that the floor looks professional. Especially with click vinyl, this point is important because the floor needs to move and consciously requires a little space at the edge.
With glue-down vinyl, the situation is somewhat different. The floor lies flat and in many cases does not require a classic expansion joint like floating vinyl. Nevertheless, baseboards create a clean transition and visually compensate for minor unevenness in the wall. Those who save here or work inaccurately will see it every day later.
Which Baseboard Suits Vinyl?
Before installing baseboards with vinyl, it's worth considering the material, height, and installation method. Not every baseboard suits every room and every wall.
MDF baseboards with foil wrapping are particularly popular in living areas. They look valuable, are available in many decors or in white, and are easy to cut. Plastic baseboards are easy to clean and are often the more practical choice in wet rooms or heavily used areas. Real wood looks high-quality but is usually more expensive and requires a little more attention to the surface.
The shape also plays a role. Simple, straight baseboards usually suit modern vinyl better than heavily profiled models. In old buildings with uneven walls, slightly higher baseboards can be useful because they conceal tolerances better. Those who want to hide cables can choose baseboards with a cable duct.
Installing Baseboards with Vinyl - The Most Important Rule
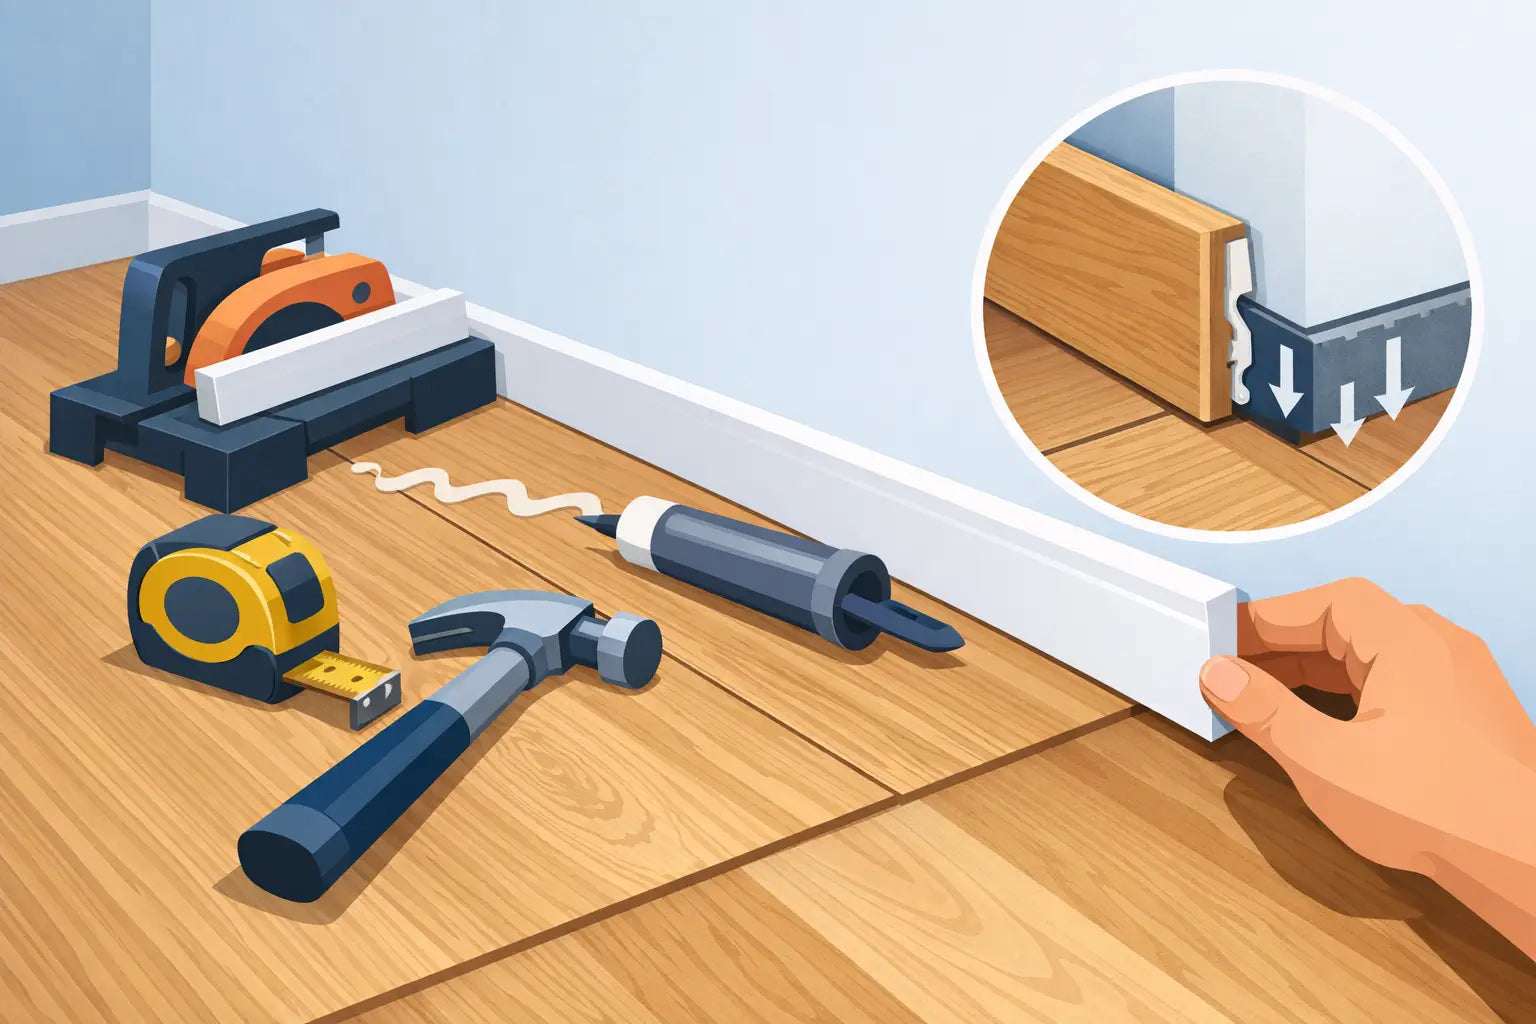
The most important rule is: The baseboard is attached to the wall, not to the floor. This applies especially to click vinyl. If the baseboard tightly clamps the floor or is even screwed into the floor, the necessary movement can be blocked. In the worst case, this leads to tension, buckling, or open joints in the flooring.
The baseboard may visually finish the vinyl floor neatly, but it should not fix it. Slight contact is acceptable. Pressure on the surface is not.
Preparation: Half the Battle Won
Before installation, the floor and wall should be clean and dry. Dust, loose plaster residue, or old adhesive residue significantly worsen adhesion if you want to glue the baseboards. Also, check that all edge distances for the vinyl have been maintained and that the floor is not placed too close to the wall anywhere.
Measure each wall section individually. Especially in existing buildings, you should not rely on opposite sides being identical. Also, plan for waste, especially if there are outside corners, door frames, or many short sections.
You don't need a professional setup for a clean result, but good tools help. A miter box or miter saw, tape measure, pencil, mounting adhesive or appropriate fastening material, and a fine-toothed saw are often sufficient.
Glue, Screw, or Clip?
Which mounting method is best depends on the wall condition, baseboard type, and your requirements for dismantling and speed.
Gluing Baseboards
Gluing is fast, clean, and a popular solution, especially on smooth, load-bearing walls. The baseboard is dotted or lined with mounting adhesive on the back and then pressed against the wall. This works well in living rooms with straight walls and avoids visible screw heads.
The disadvantage: On crooked or crumbling walls, gluing often holds less well. Also, subsequent dismantling is more elaborate and can damage the wall. This is not always the first choice for rental properties.
Screwing or Nailing Baseboards
Screwing is durable and often the safest solution for uneven walls. The baseboards are firmly seated and can be removed if necessary. Craftsmen often choose this method when the wall does not offer an ideal adhesive surface.
Visually, the solution is somewhat more technical if the fastening remains visible. However, this can be solved well with suitable cover caps or concealed mounting.
Attaching Baseboards with Clips
Clip systems are practical if the baseboard needs to be removed later, for example, for rework or laying cables. The clips are attached to the wall, and the baseboard is placed on top. The result looks neat and flexible.
However, clips do not work equally well on every wall. With strong unevenness, the baseboard can protrude in individual places. Here it quickly becomes clear whether the wall and system really fit together.
How to Proceed Cleanly with Installation
Ideally, start on a well-visible, as straight as possible wall. Cut the first piece cleanly to size and pay attention to how inside and outside corners run. Accuracy counts with miter cuts. Even small deviations will be noticeable later.
Position the baseboard so that the expansion joint is completely covered. Especially with click vinyl, the baseboard should reliably conceal the edge area without trapping the flooring. If the wall is slightly wavy, a flexible acrylic joint at the top edge can help. Between the baseboard and the floor, however, rigid material should generally not be used for grouting, because the floor needs freedom of movement.
Work section by section and regularly check the alignment. A baseboard that sits cleanly for the first two meters but visibly sags at the end ruins the overall impression. Take a little more time at corners and door passages. That's where people will look first later.
Solving Inside and Outside Corners Without Trouble
- Opens in a new window.